Pinterest Pixel

For the Love of Light-Two Unique Lighting Fixture Projects

Here are two easy, upcycled lighting fixture projects to try at home.


Six-light wine bottle chandelier with garden in the background

When it comes to creating a lamp or new lighting fixtures, the possibilities are endless when you use upcycled materials as your muse. The word “upcycled” may get overused but when you look around Pinterest or your own space for design ideas, it’s hard not to get inspired and motivated about turning an existing item into something creatively new and unique. Reclaimed materials offer a wealth of techniques and tips on getting started with a lighting project of your very own and you don’t have to be an electrician or environmentalist to enjoy the benefits of upcycling. Here are two great lighting projects to consider if you want to give it whirl.

The Wind Lovers Chandelier

A great idea from Expresso Partners, this project is for wine enthusiasts whose style maybe be more minimalistic and contemporary. Drinking the wine out of the bottles first might just be the fun part before removing the labels and soaking them in hot water. If you wanted to zero in on a more stylish look, you could combine different wine bottles of varying colors.

Materials Needed

  • Empty wine bottles with corks
  • Strong 3M tiger tail wire
  • Complete lighting cable
  • Crimps
  • Jump rings
  • Energy saver light bulbs
  • Pliers
  • Cutting knife

  • Strong 3M tiger tail wire against white background

    Before starting, you’ll need to make a trip down to your local lighting store and purchase a complete light fitting that includes the fitting, ceiling cup, cable and bulb holder.

    1. Soak the wine bottles in soapy hot water. Soaking the bottles with help the wine labels come off much easier and faster.

    2. Cut the braided wire to the appropriate lengths of desired height. Measure out how long you want your chandelier to hang at and then attach your jump rings onto the wire using a crimp.

    3. Thread the other end of the light cable wire through the ceiling cup and attach a jump ring to the ceiling bracket using your crimp. This will help hold the weight of the bulbs and the wine bottles. When completing this step, it’s best to use energy saver bulbs because you don’t want the bulb to crack while you’re trying to hang the wine bottles.

    4. Install the light fitting with all the loose braided wire lengths attached. This can be done by a novice, but it should at least be checked by an electrician to make sure it is electrically sound and correct.

    5. Cut the wine cork vertically with cutting knife. As a nice finishing touch, place the wire inside the cut side of the cork and then push the cork back into the bottle to allow for a very secure fit during hanging.

    Industrial Library Lamp

    Homemade industrial light atop stack of used library books as the base of the lamp.

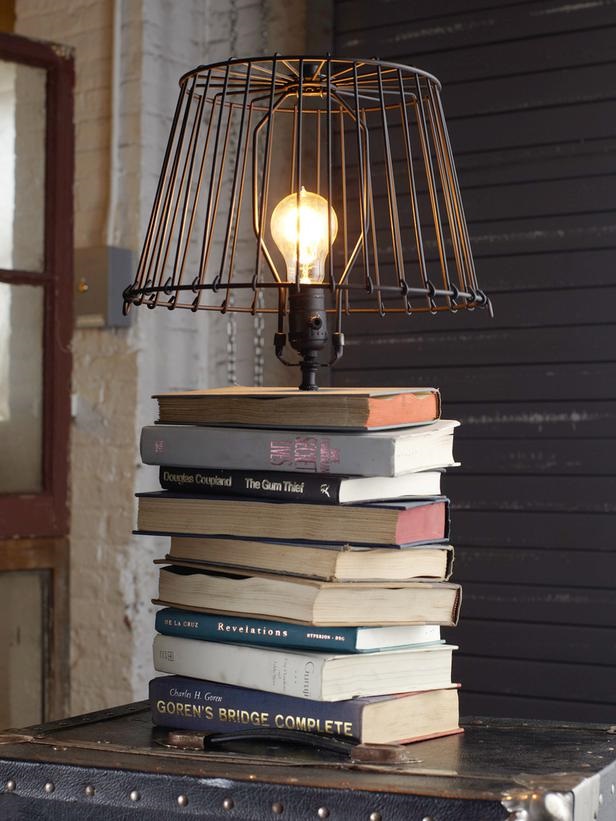
    This DIY project requires a lamp kit purchase. If you don’t like the existing finish, you can always spray paint it with a matte black to give it a more interesting and rustic look. If you’re a true book lover and don’t want to upcycle or destroy some perfectly good books consider the option of cutting various sizes, shapes & colors of wood and paint them to look like classic books, then build your lamp accordingly. Ready-made classic and vintage elements give this an industrial urban chic feel and a cool vibe to any hip house or apartment.

    Golden lamp kit pieces against white background

    Materials Needed:

  • Lamp kit
  • Old books
  • Wood screws
  • Old style filament bulb
  • 2-C clamps
  • Drill
  • Vintage egg crate basket

  • On average, a simple lamp kit will only cost around $8-$15 depending on where you buy it.

    1. Purchase a Lamp Kit and find some books that you won’t be reading again.

    2. Position the books and drill wood screws through each book cover except for the bottom one. Make sure to position them accordingly to your envisioned design.

    3. After you have attached each book cover, drill a hole all the way through the stack of books in order to snugly fit the post from the lamp kit.

    4. Insert the electrical cord through the bottom book and up through the post. Finally you can screw the bottom book onto the rest of the pile.

    The bottom book will take a little bit more work as it has to allow entry for the electrical cord to pass through.

    5. Wire your lamp and attach the egg crate basket shade to the top of lamp using the two C clamps.

    Old books stacked atop one another with a hole in the pages for the electric lamp cord to go through.